No products in the cart.
How long since you’ve seen a drone aerial video on Facebook?. Not long right? Drones and drone photography and videos are becoming hugely popular with photographers but also with those who want to get into photography but have next to no experience.
Today, we’re going to share with you a guide, where you’ll find everything you need to know regarding drones and the art of drone photography right here!
Whether you’re a beginner, wanting to grab a few cool shots or an experienced professional looking to stay informed and keep others up to date, this is a handy guide to drone photography.
When referring to drones, you usually associate the name with remote control multi-rotor devices, which while known by the term ‘drone’ are technically not drones. Drones have been around for many, many years before we started using them for photography and hobby flying, and while it might seem this is one of the biggest uses for them, Dubai is currently looking to use drones as a taxi service, having staged a maiden test flight for one of their taxi’s in September 2017.
Although the name “drone” will forever be irrevocably linked with these small multi-rotor or quadcopter devices, anything which is remotely controlled without too much intelligence can be called a drone. But we’ll refer to quadcopters and multi-rotors as drones to avoid confusion. Drones in recent years have become much more affordable, having started out costing hundreds, you can now pick up a decent drone for around $50-100, which gives you the opportunity to pilot your own, shoot pictures and get some breathtaking videos without having to fork out hundreds of your own hard earned money.
Types of Photography Drones Available
When we talk about drones, it includes everything from UAV’s used by the military for various reasons to the multi-rotor devices that we’re currently talking about which are used for aerial photography! There are three main categories that drone’s fall under:
Fixed-Wing Drones

Similar in design to modern day airplanes, fixed-wing drones started operating at the beginning of the 20th Century.
These are usually the type of drones associated with the military (predator drones etc.) These could be considered the beginning of the whole aviation industry.
Fixed-wing drones consist of a rigid wing placed across the top of the body and they continuously move forward due to the turn of a propeller, meaning they have to keep moving and unlike rotary-wing drones they can’t hover in place nor stop in midair.
With a simple structure, this drone/UAV represents minimal risks of mechanical failure. As well as minimal mechanical failure, the simple design of these drones’ results in efficient aerodynamics allowing extended flight duration at higher speeds much like an airplane.
Rotary-Wing Drones
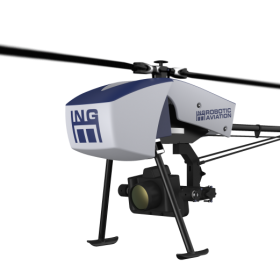
This category of drone is the smallest of all. Similar in their design as that of modern day helicopters, the ability to remain airborne through a single propeller which is placed at the top of the drone and is the only moving part of the whole frame. These drones aren’t overly common in outdoor use as they have very limited forward speed and high sensitivity to wind and nature, meaning they can be throw of balance with one small gust of wind, potentially causing damage to not only your drone but anyone/thing in the vicinity.
Multi-Rotor Drones or Quadcopters / multicopters
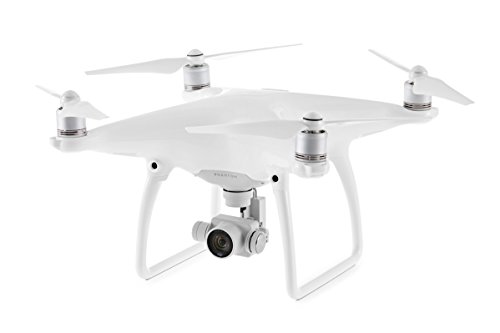
These are the drones we now think about when someone mentions ‘drones’ and are the type we’re currently talking about.
This category of drones is the largest one out of them all. There are a number of different rotary-wing drones, such as; bicopter (two motors), tricopter (three motors), quadcopter (four motors) as well as hexacopters and octocopters (six and eight motors retrospectively).
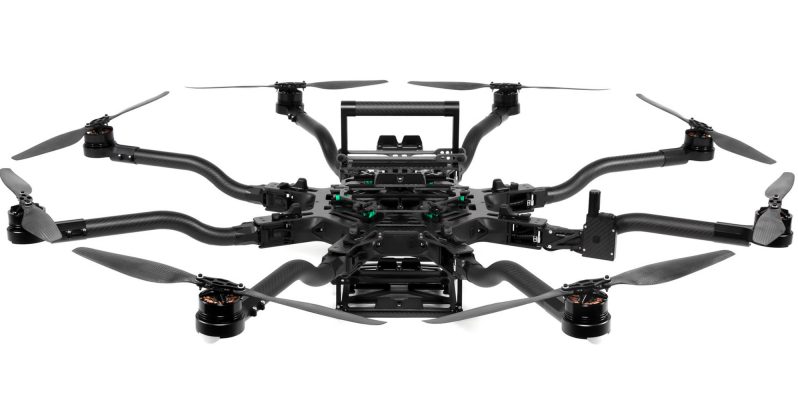
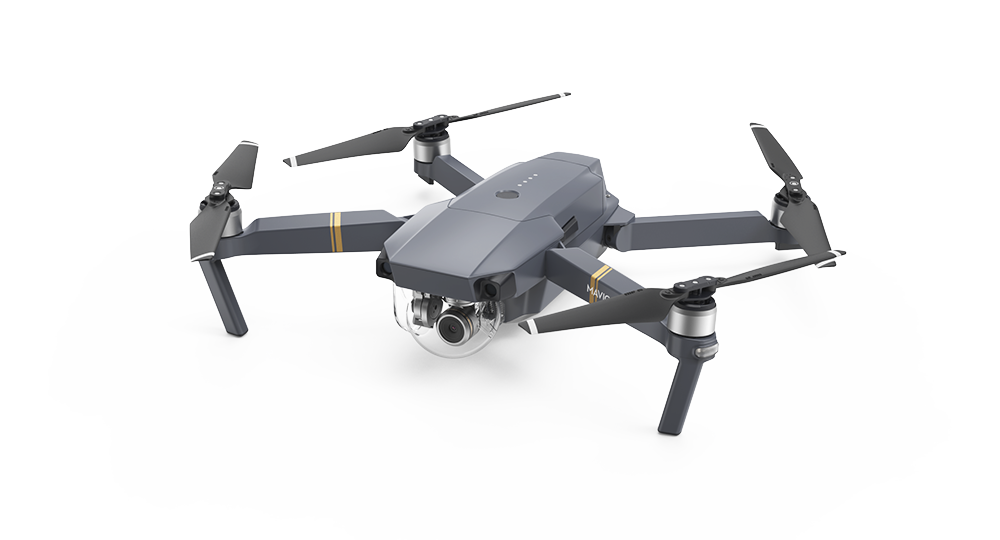
The most frequently used type of multi-rotor drones found in the modern day is the quadcopter, used within the photography industry as the drone of choice by such places as Meadows Farm Studios and other aerial photography studios, photographers, and novices. Unlike rotary-wing drones, quadcopters are able to withstand moderate wind gusts and remain fairly balanced.
Choosing the Right Photography Drone for You
If you haven’t already rushed off and acquired your own drone, then it’s best to think of a few things before making your first purchase.
Not all drones are easy to fly
If you want to buy a drone, you should first know that anything that flies is going to be hard to control.
All quadcopters fly slightly differently to others depending on how the flight controller is set up. Some are set up to be more agile flying, while others are more geared towards stability. One downside to drones is that the easier to use drones; meaning the ones with more assistance, sensors and functionality, usually cost more than the harder to use drones.
It’s important to learn to fly your drone in an open place such as a field in order to ensure you are capable of controlling your drone before attempting to fly closer to buildings etc for photography purposes.
Is Your Drone Ready to Fly?
When you’re purchasing a drone, keep your eyes open for a few little acronyms that will pop up; RTF, BNF and ARF. These all have different meanings and if you miss them, you could be in for a surprise.
RTF stands for Ready-To-Fly: This means that the drone in question requires no assembly or setup from you, although charging the battery, installing propellers etc might be on the list of things required but other than these minor simple 5 minute jobs. Besides these small requirements your drone is basically flyable as soon as you buy it.
BNF stands for Bind-And-Fly: a BNF drone usually comes completely assembled but without a controller. Without BNF models, you’ll have to use the controller that you may already have (provided it’s compatible) or find one that is! Don’t think that just because your transmitter and receiver are on the same frequency they’ll instantly work together, because that isn’t always the case. So always check that the controller will work with the drone before making your purchase.
ARF stands for Almost-Ready-To-Fly: these drones are more drone kits than anything else, and are usually for the enthusiasts that want the honour of saying they put their drone together themselves. ARF drones usually don’t come with transmitters or receivers; some will even go as far as leaving out controllers and even batteries. Always read the description of the product before making a purchase to ensure you don’t get a potentially costly surprise.
Recommended Reading: Which Are the 5 Best Drone Kits from Amazon (2025)?
Buying a Drone for Photography
If you plan on taking drone photography or even just drone flying up as a full-time hobby or even going as far as to make it your potential part-time job, then you should make a few investments. If you’re looking for a small drone that you can annoy the dog with then you can probably skip right past this point.
For the hardcore enthusiasts, we recommend a few things.
- Controller, always invest in a decent controller. A controller is one of the best investments you’ll make when it comes to your drones. Unlike most tech, they don’t become outdated very quickly so it’s a worthwhile investment, and if looked after correctly, you probably won’t have to replace it very often.
- Charger, we highly recommend buying a good charger! It probably seems stupid to buy a new, better charger, but just like your controller, once you have a great charger you won’t need to replace it for years!
- Research; don’t rush into buying your first drone. Do some research and gain a little knowledge about what you will be purchasing, this way you’ll fully understand the difference between all of the drones on offer as well as gaining some valuable knowledge regarding parts more suited to a job than others. In the long run this will save you from buying bad products, making bad decisions and wasting your money. Make sure the drone you’re purchasing has all the features etc. that you’re looking for. Compare battery life and more between various drones and make sure you get exactly what you want.
- Where to Buy From: If you’re unsure the best place to purchase your drone from, don’t worry. There are a tonne of places online to buy from as well as many hobby stores! Possibly the largest place for drones is Hobby King, it’s an American store that caters to the almost every country, with a huge range of drones and other remote-controlled devices. With big name brands as well as their own designs, if you can’t find a drone there then you might be looking too hard! It all depends on how much you’re willing to spend, if you’re looking for a cheap direst time drone to practise with before you upgrade to something serious, you should check out this list of “17 Best (Cheap) Drones for Beginners”. If money is no object then you might want to check these drones out; “The Most Expensive & 10 Insanely Priced Drones”.
Choosing Your Equipment, Attachments & Accessories
In order to get the best from your drone experience, you might need a few other bits of equipment, such as:
- Gimbal – This is a must-have for any drone photographer! It provides smooth stability for your camera which will provide better quality footage, regardless of weather conditions. There are different types of gimbals for different price ranges.
- Extra Batteries – Extra batteries are always a great idea! It means more flying time! When one dies, you have another fully charged back-up to double your fly time.
- Crash Pack – Exactly what it sounds like. Saves you when you lose control and crash your drone! Keeping your drone intact and saving you a potentially costly repair bill!
The environment and weather conditions play a huge part in your video or photo quality:
- Weather & Wind Conditions – The wind is a main factor behind most ruined footage. It’s best to avoid flying your drone on a day with wind speeds above 20 MPH as this can disrupt your drones flight pattern and caused slightly blurred pictures due to instability, although your drone can probably cope with speeds up to 30 MPH, it’s the camera that won’t deal so well. Flying with the wind will always help the quality of images captured. If you need a forecast before flying, this is a great site: UAV Forecast.
- Altitude of Flight – There are a few camera settings you should adapt to your specific altitude on the day of the shoot: shutter speed (controls the duration of light that reaches the CCD), white balance (the way your camera interprets the light colour in a scene), and aperture (control the amount of light that reaches the CCD – For aerial photography, F8 is perfect). These are the main settings that will determine the quality of your photographs or footage, so do a little research before heading out to fly and it’ll save you a lot fo time while you’re out there.
- Imagery Style – The particular style you want your images to have will determine the camera settings, as well as the post-processing techniques you should use.
Planning Your Flight Path for great Aerial Shots
The key to getting spectacular aerial photos is to plan in advance. Put together and know your route before you head out – even if it’s just a rough route – the duration of your flight, the obstacles you might potentially face and the weather conditions before you even take your drone out of the house.
Another important thing to consider is that you are not allowed to fly your drone in certain places due to laws and regulations; this includes places such as near airports or over private properties. You can be potentially sued if you break this law, so be sure to check your local rules and regulations before you start flying your quadcopter. You can read more about specific laws and regulations in our next section.
Drone Photography Privacy Issues You MUST Consider
Another concern with drone photography is privacy, as more and more people acquire and use drones to shoot footage of public spaces, it’s inevitable that you’re going to encounter one or two privacy issues.
You are not legally allowed to photograph or film an individual without his or her consent which leads to a murky situation when it comes to drones as you’ll accidentally and often without realising capture images of various people on your flights.
How can a drone operator that is filming a protest, for example, ask for everyone’s permission before flying his device? Well, the regulators realise this is close to impossible and so suggest making yourself clearly visible, so that people know who the operator is and this way ensuring that they can leave if they do not want to be filmed or photographed. If they can clearly see you and recognise that you’re filming or taking photographs and decide to stay, this is as close to their consent as you’re likely to get without asking.
Safety Precautions for Safe Flying
You should always be careful when flying your drone in public as it can be potentially dangerous if you lose control etc. The main precautions you should take when flying your drone are:
- Do not fly in any precarious weather conditions! Strong wind, rain, and snow are not your friends, and they will certainly damage your drone, which means you should avoid these weather conditions at all costs, unless you’re not too concerned with damage to your drone.
- Do not fly too close to private properties that you do not have permission to film or photograph and do not get close to people because you might violate privacy regulations and end up with a fine to pay.
- Stay away from schools, churches, stadiums, and airports as these can be awkward when it comes to privacy issues etc.
- Be sure to register your drone if you are using it for commercial purposes.
- Do not allow children to fly the drone as this is potentially dangerous!
- Do not take your drone above busy highways or crowded public places as if something fails and the drone falls towards the ground you’re likely to cause harm to someone!
- Use the drone in rural, scarcely populated areas and avoid trees and buildings where possible.
Things to Remember When Flying Your Drone
We know you’re probably anxious to get out and fly your new drone and see what it’s capable of, but it is important to always keep in mind a set of important rules to ensure that your flight is a pleasure and not a headache.
- Your drone is not a toy, while it is fun, you need to be responsible and use it only in permitted areas!
- Every drone is different, so practice, before you take yours out for a spin, even if you have piloted another before. They do not fly, work, or move the same as settings and sensitivity is different on each drone!
- Respect people’s privacy and never lower your drone to photograph or film them up close.
- Be aware of laws and regulations surrounding your drone and carry your permits with you wherever you are flying the drone just in case you are questioned.
- Be careful if you want to use the drone in confined spaces.
- Do not go over the specified altitude recommended for your drone, it’s recommended for a reason.
- Do not allow inexperienced friends to try flying the drone, as this reckless behaviour might lead to accidents.
Drone Photography Tips and Techniques for Taking the Best Possible Pictures
As it was already mentioned, the best possible pictures you can take with your drone are those that mix quality with creativity. When it comes to drone photography, the sky is literally the limit, so invest in some quality gear that will allow you to explore all the possibilities of this remarkable medium.
Start by practising and perfecting your flying skills this means you’re ready for any situation or slight weather changes etc., and then move on to discovering what your drone can do and how you can adapt the camera setting for the various situations you may face. Below, you can find some pro tips that apply to both beginners and professional drone operators that will ease the process of getting the best results with your drone.
- Great location – The key to great aerial photography that will take your breath away is finding a stunning location that will transfer well into your photographs.
- Reduce vibration – To avoid blurry, hazy, low-quality photographs you must reduce and even eliminate vibration from your drone, which you can achieve by using a special device (a gimbal) and developing a steady hand when controlling your drone – Many drones come with the ability to hover in place at a certain altitude etc. meaning you’ll be able to capture photographs easier.
- Avoid obscuring elements – Your flying time can be ruined by obscuring features, such as buildings and trees, so make sure you shoot in a plain, clear space, as sparsely populated as possible.
- Be careful with the shadow produced by your drone – Always be aware of your drone’s position in relation to the sun to make sure that the shadow produced by your equipment is out of the shot, this is something that is unavoidable, so if you want a shot from a certain angle, you’ll have to plan the suns position to avoid shadows.
- Purchase a decent gimbal – As it was already mentioned earlier, a good gimbal is a life saver for any drone photographer as it spares you the trouble of worrying about shaky, vibration-affected photographs.
- Shoot from different angles – A great tip, especially if you’re a beginner, is to shoot various angles of the same subject to get a grasp of what effect your movement produces on the resulting image. Try various angles and see what you like.
- Invest in a powerful camera – This goes without saying, but a powerful, high-quality camera will help you along the way, and you should definitely invest in a top notch product if you want to get great aerial photographs.
A Few Examples of Breathtaking Aerial Photos and Footage
Now that we’ve seen how to take great drone photographs, let’s see a few results of spectacular drone photography and aerial footage!
Deer Park – Video by Richard Pinches of Meadows Farm Studios
General Showreel – Video by Richard Pinches of Meadows Farm Studios
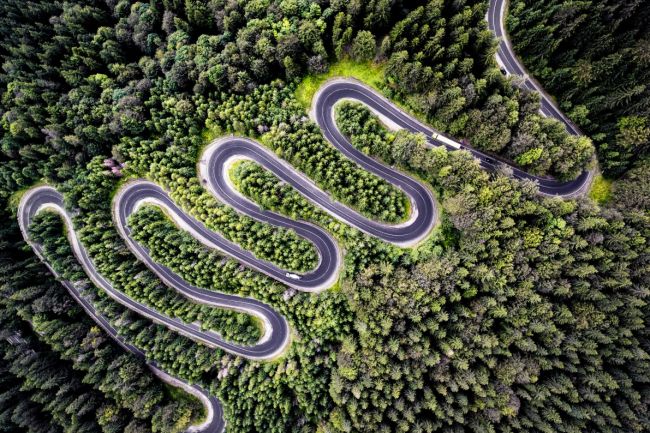
Best Drone Images of 2022
Conclusion
Of course, you’re excited to just get out there with your drone and start trying your hand at capturing some breathtaking images like we all were! But you need to remember that it’s not just you out there, drone photography can be potentially dangerous if you aren’t careful and fully aware of how to use them, as well as rules and regulations as to when and where you can use them. So have fun flying your drone, capturing some amazing images and most of all, be careful and enjoy yourself.

What a beautiful footage you got there, and thanks for the guide I’m still learning since I’m still a newbie.
It’s great to know that there are other pieces of equipment used to reduce the vibration aside from having a steady hand. I will share this information with a friend of mine to help them choose a company that uses an equipment like that for a better shot. They just need their services because they plan to promote the vacation rental house that they just bought as an additional income for their family.